Hello ,
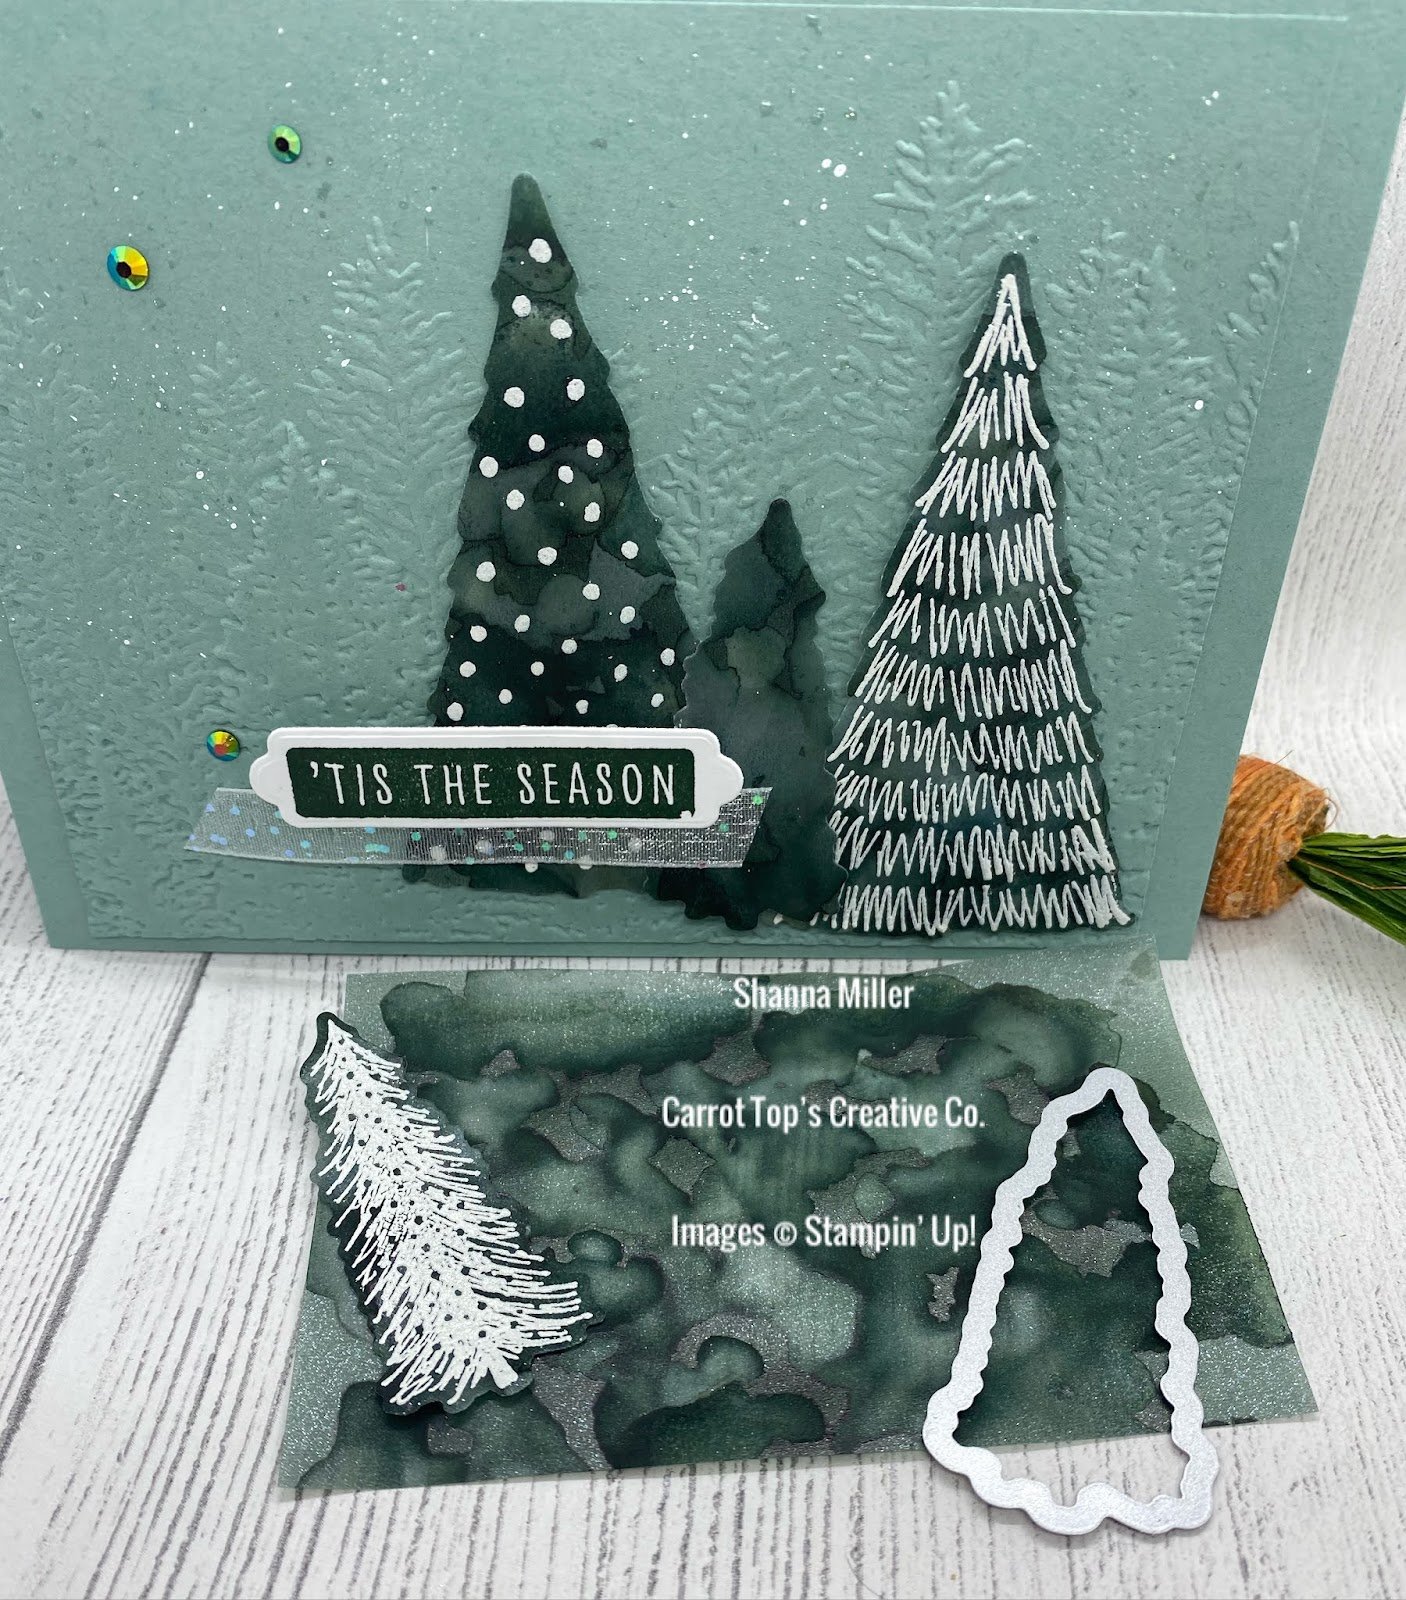
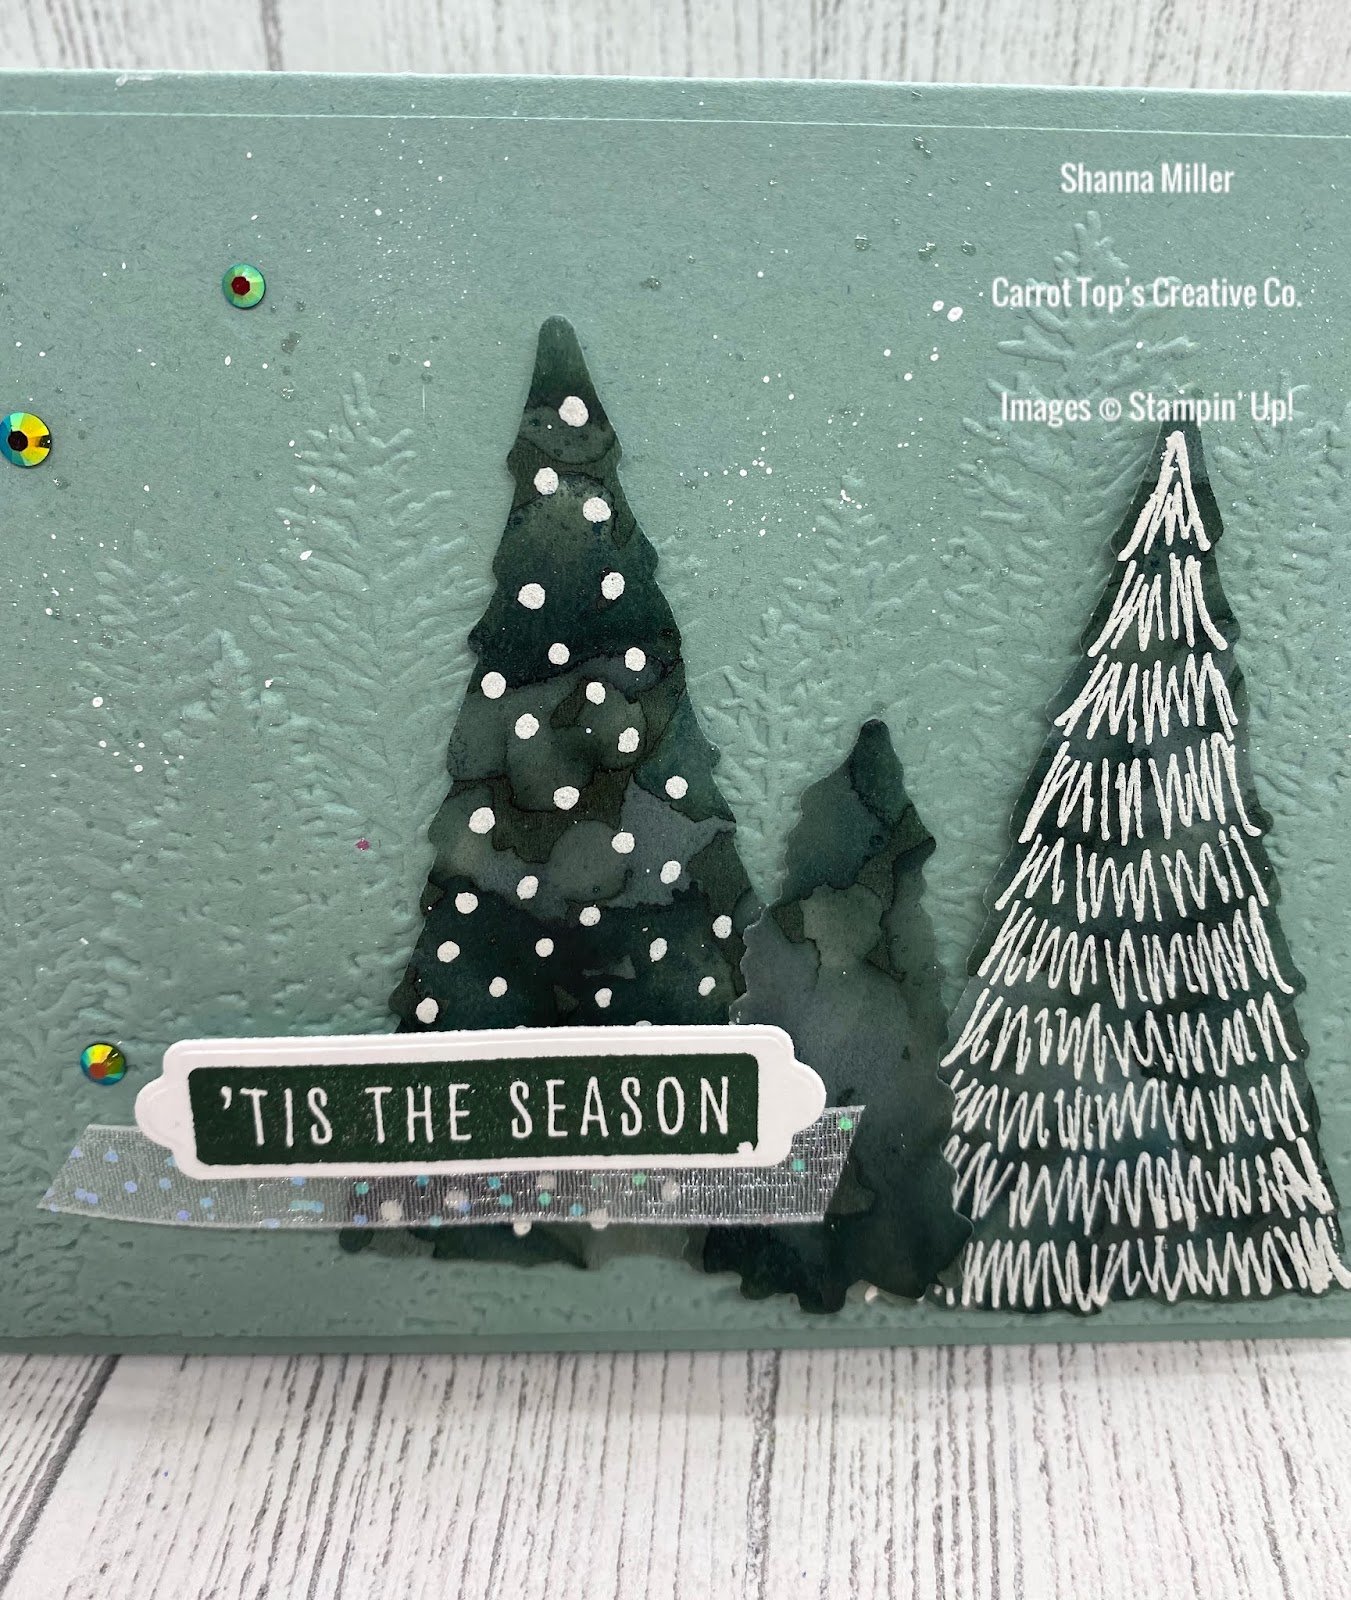
Welcome back to Week 9, in the Countdown to Christmas Series. Have you started your cards yet ? It is sneaking up on us quickly. I find it so hard to be a month ahead of myself in making christmas anything really, but this series is forcing me to get my act together 🙂 So Today I have a fun card using the Alcohol Technique and Shimmer Vellum. Its fun the kids could help with this prep work and each card is so uniquely different.
Supply List:
·
Whimsical
Trees Stamp Set & Christmas Trees Dies.
·
Christmas
to Remember Stamp Set & Seasonal Labels Dies.
·
Ink:
Evening Evergreen, VersaMark .
·
White
3/8’ Glittered Organdy Ribbon – 2 ¾’.
·
Wintery
3D (pine boughs) & Evergreen Forest 3D Embossing Folder.
·
Blender
Brush & Water Painter Brush.
·
White
Embossing Powder & Heat Gun.
·
2021-2023
In C In Color olor Shimmer
Vellum – Evening Evergreen.
·
2021-2023
In Color Jewels
·
Chalk
Marker & Wink of Stella Pen.
·
Stampin’
Blend : Evening Evergreen
·
99%
Isopropyl Alcohol.
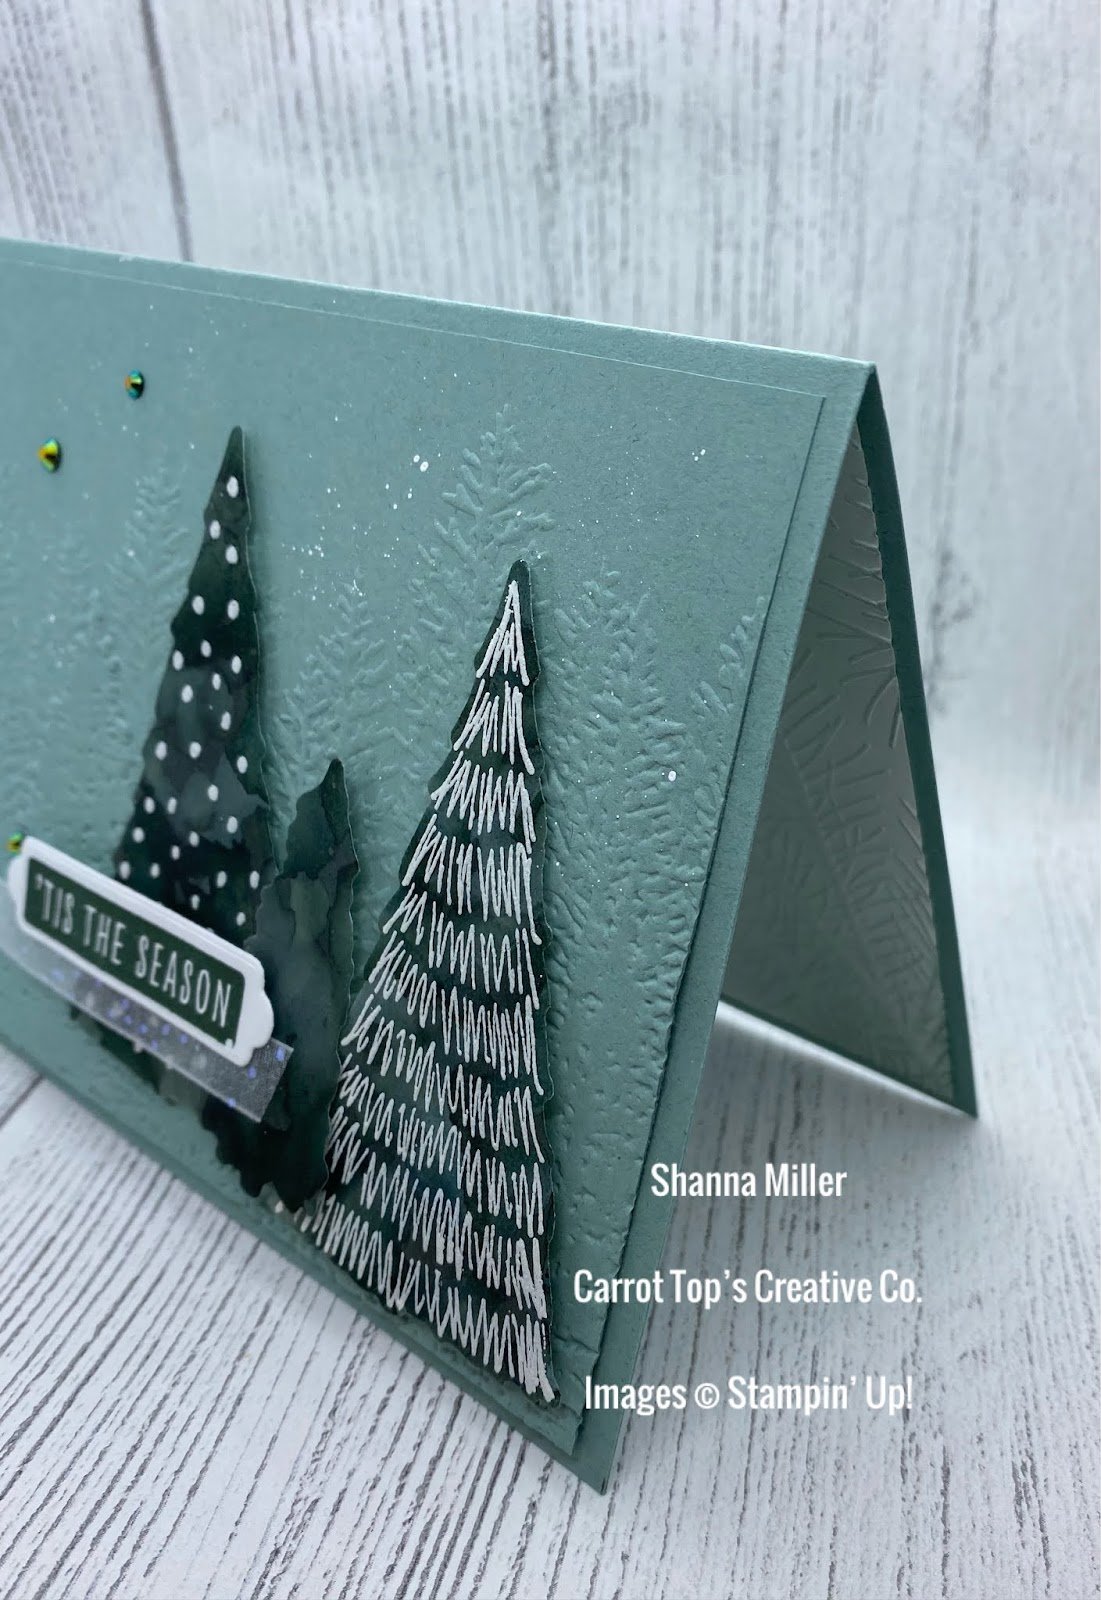
Dimensions:
·
Soft
Succulent Card Stock Base Layer 5 ½” x 8
½ “, scored at 4 ¼”.
·
Soft
Succulent Layer 5 ¼ “ x 4”.
·
2021-2023
In Color Shimmer Vellum 5 ¼ ” x 4“.
·
Basic
White Card Stock 5 1/4 “ x 4” for inside layer
·
Scrap
of Basic White for die cut of sentiment.
Instructions:
your Soft Succulent layer piece and insert straight in the Evergreen Forest 3D
Embossing Folder, turn through the Cut & Emboss Machine. Using
your Chalk Marker & Wink of Stella add some speckling over the tree
embossed layer.(To create the speckling, I “flicked” the tip of the Marker and
Stella Pen against the inside edge of the cap, and “flicked” outward towards
the cardstock) **Make sure to have only this paper piece on the desk at this
time as speckle goes everywhere. Adhere
this layer down using Stampin’ Seal, to your Soft Succulent Card Stock Base
that you have folded in half.
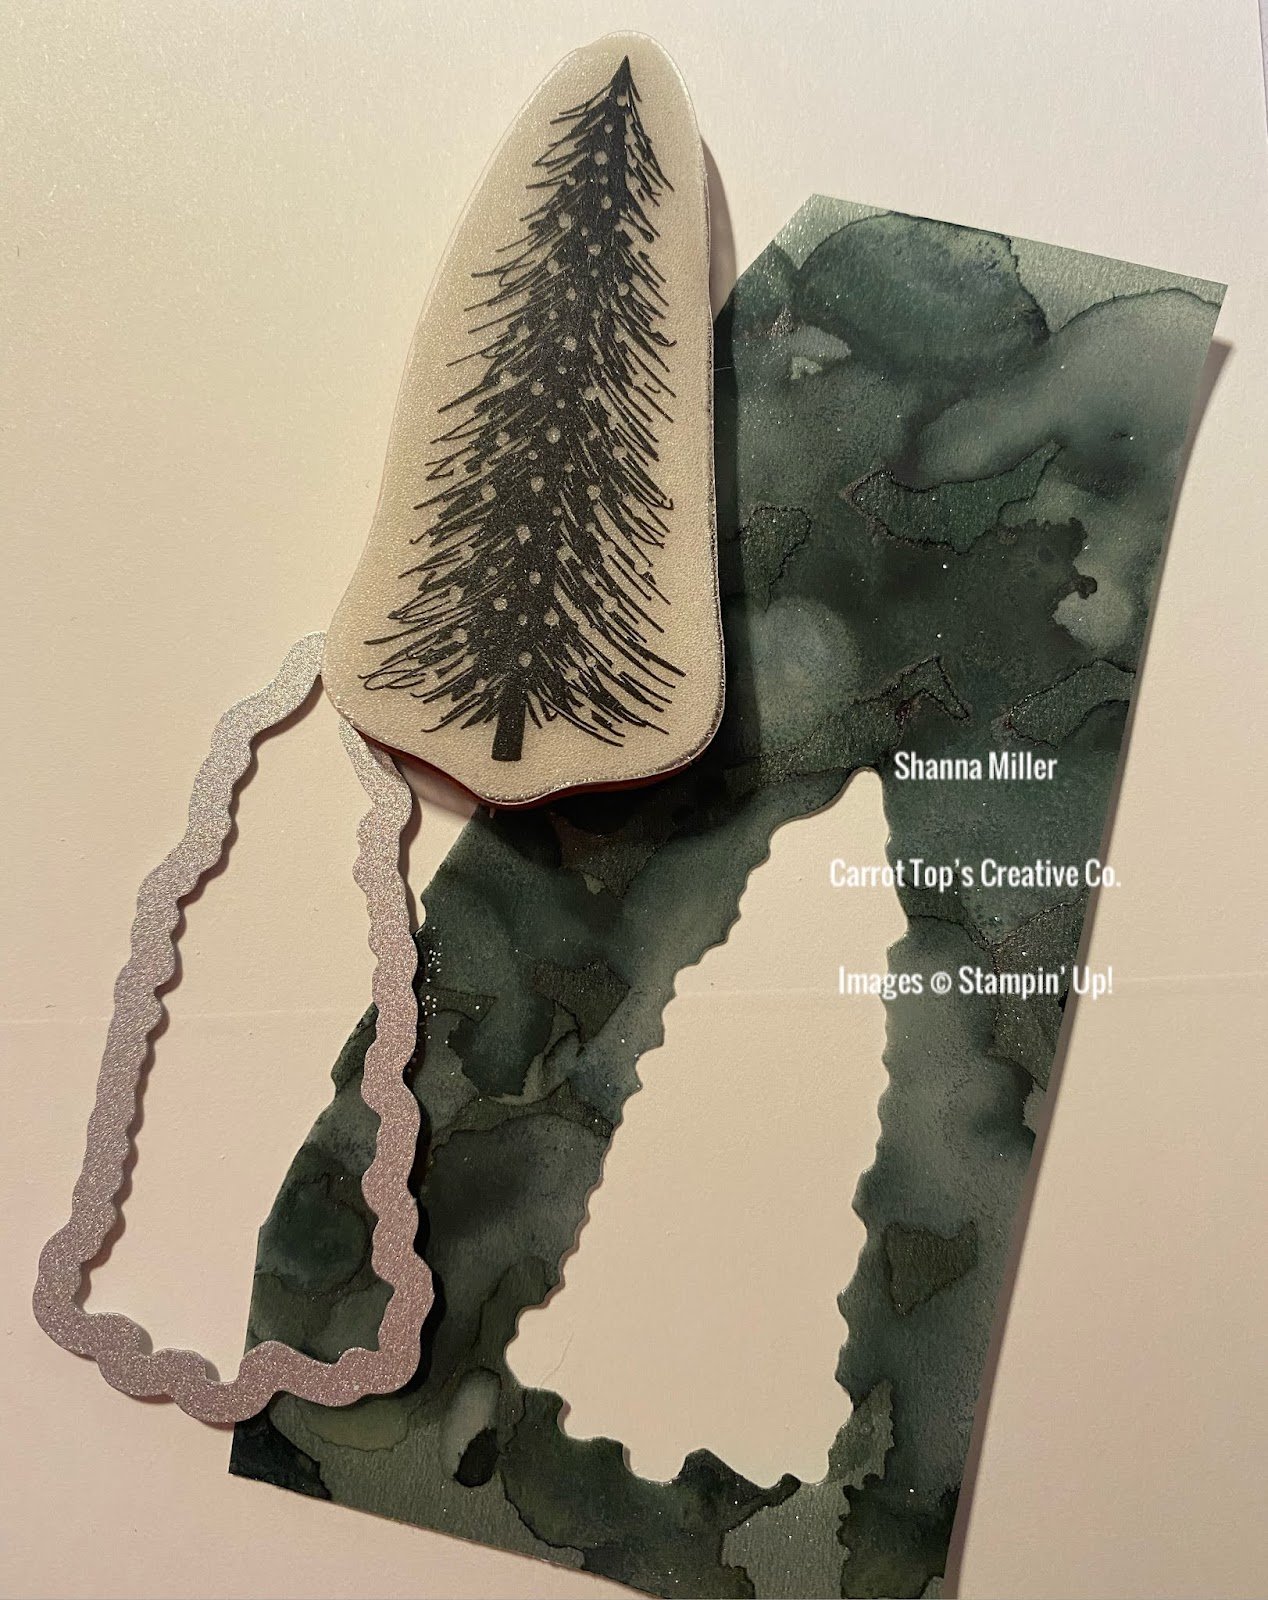
Next,
on our 2021-2023 In Color (Evening Evergreen) Shimmer Vellum piece we will do
the Alcohol Technique.
Step
by Step: Using a bit of removable tape secure your vellum sheet to a plastic
Ziploc bag on your desk top to protect it.( you can use DSP backing sheets as
well.) Begin scribbling randomly with the Evening Evergreen Stampin’ Blend onto
the Shimmer side of the In Color Vellum. When you have the desired amount of
color scribbles down, put a bit of 99% Isoproply Alcohol in the cap of the
bottle, take your Water Painter Brush (empty of all water) dip into the Alcohol and dab onto the areas
you have scribbled. It will start to dilute and run to make a cool design. Set
aside to dry.
With
Evening Evergreen Ink and the Sentiment from the Christmas to Remember Stamp
Set, stamp on to your scrap of Basic White Card Stock, Then die cut out on the
Cut & Emboss Machine using the Seasonal Label die that coordinates. Your
Vellum Technique piece should be dry, Take tree pattern stamps from the
Whimsical Trees Stamp Set and stamp in VersaMark right onto the vellum,
Sprinkle with White Embossing Powder and heat set.
With
the Christmas Trees Dies, cut out tree shapes in various sizes with the Cut
& Emboss Machine. Apply
Dimensionals to the backs of the tree diecuts and layer in the right hand
corner of your card front embossed layer. Attach
with a strip of Stampin’ Seal on the back side of your sentiment cutout your
diagonally end cut White Glittered Organdy Ribbon, then apply Stampin’ Seal to
attach whole cutout to your card front.
Decorate
with 2021-2023 In Color Jewels in Evening Evergreen.
For
the inside, run just the edge of the Basic White Card Stock thru the Cut &
Emboss Machine with the Wintery 3D Embossing Folder (pine boughs). Highlight
with a Blender Brush and Evening Evergreen Ink, ever so lightly.
Leave a Reply