Hello,
Welcome to Week 11, Poinsettia Petals Stamp Set was a carry over set from last years catalogue, and I am so glad. It is Stunning, the detail is on point and the coordinating dies make it so easy to build up a poinsettia flower out of all our amazing specialty papers, like Red Velvet, White Velvet, Pearlescent, Shimmer Gold Vellum, Kraft 6×6 , Rose Gold & Gold Metallic 6×6. You will love this set for years to come.. I know it’s never leaving my Craftroom Collection 🙂
Let’s have a look at the card I created…
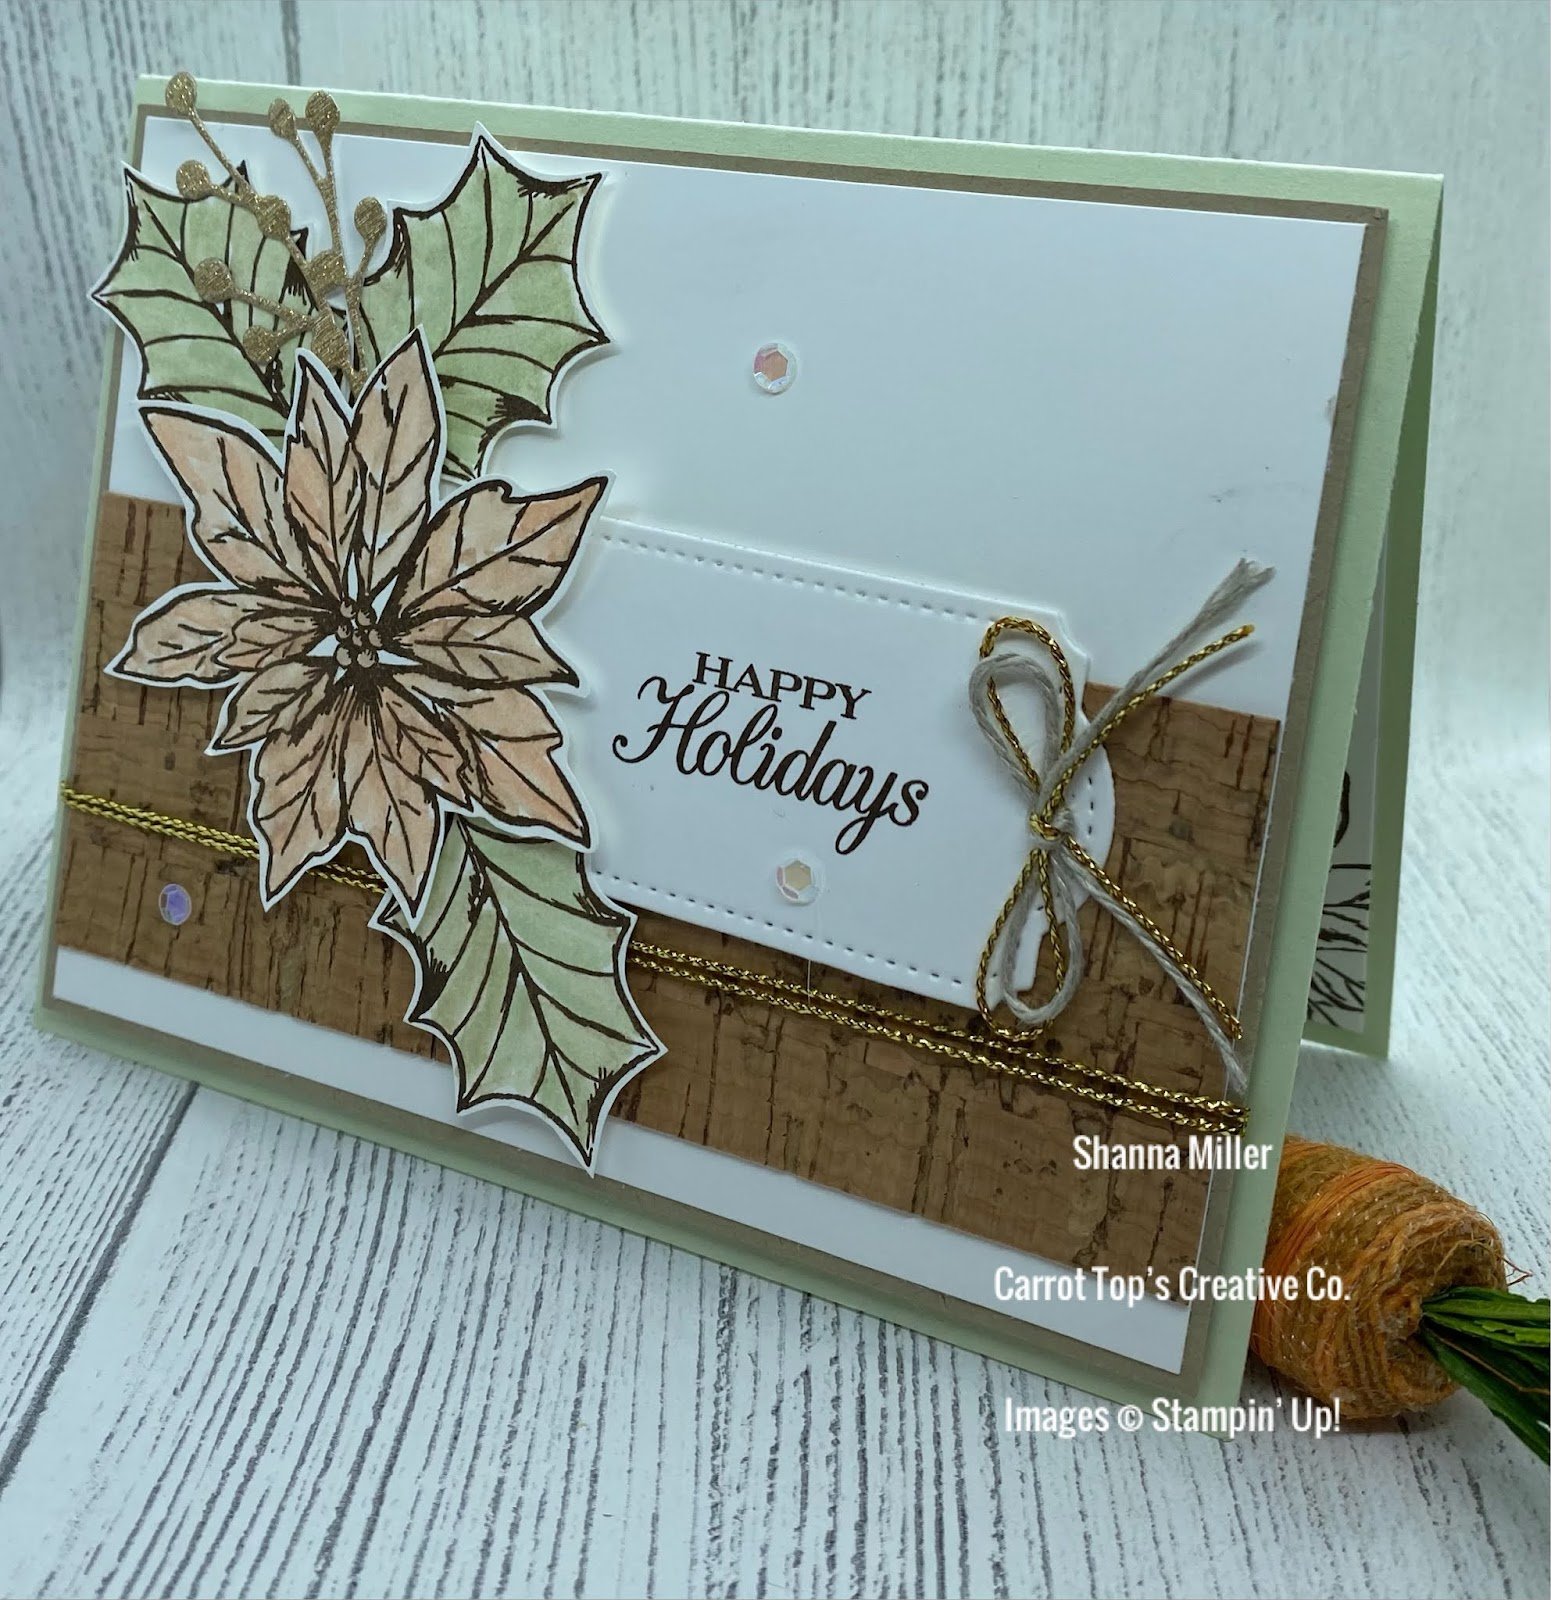
Poinsettia Petals Stamp Set
Soft Sea Foam Cardstock Base 8 1/2′ x 5 1/2′, scored at 4 1/4′.
Crumb Cake Cardstock 5 1/4′ x 4′.
Basic White Cardstock 5 1/16′ x 3 15/16′.
Cork Specialty Paper 5 1/16′ x 2′.
Scrap of Gold Metallic 6×6 Specialty Paper – for diecut.
Scrap of Basic White Cardstock for tag diecut.
Basic White Cardstock 5 1/4′ x 4′- times 2pc. ( Inside & for stamping and diecutting flower & leaves)
Ink: Early Espresso, Petal Pink, Soft Sea Foam.
Ribbon: Linen Thread, Simply Elegant Trim -Gold.
Dies: Tailormade , Poinsettia.
Expressions in Ink Ephemera Pack- sequins.
Water Painters.
Let’s build the card…
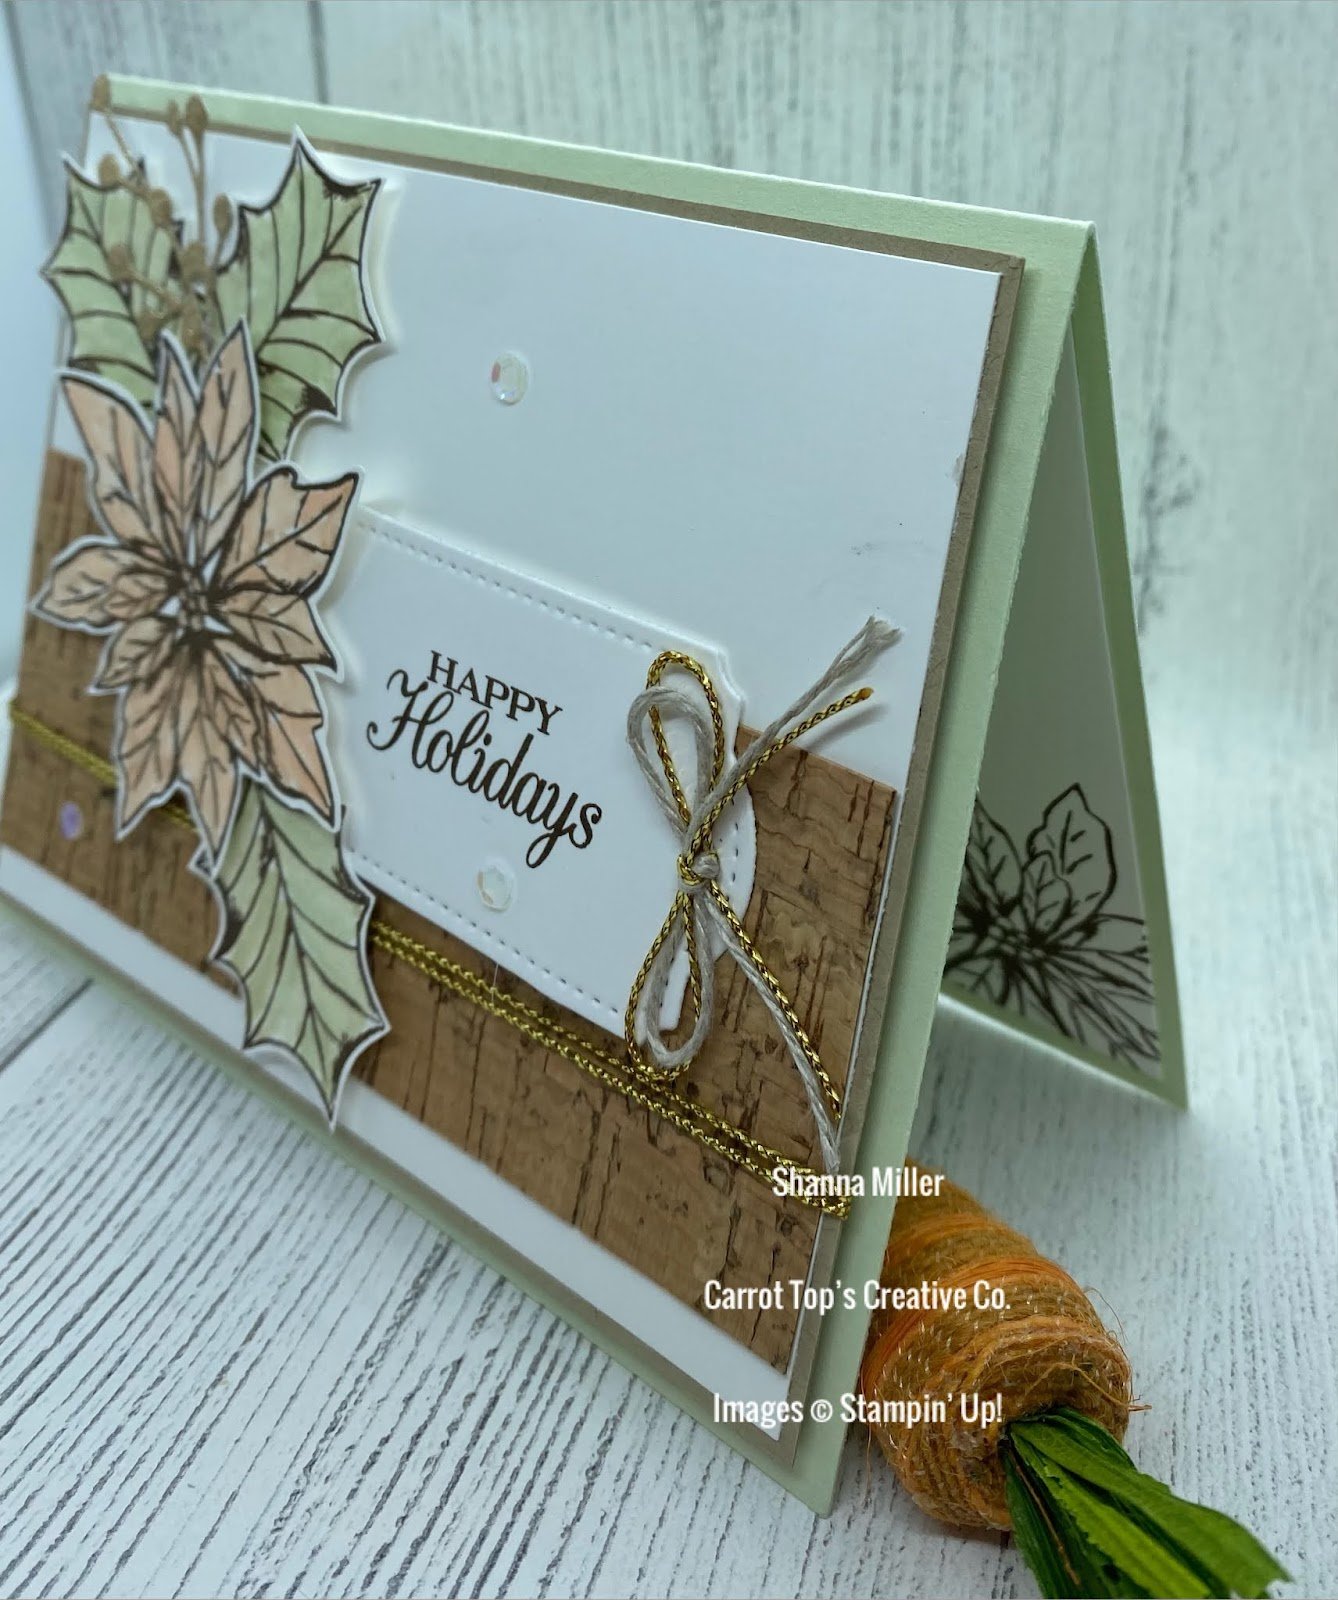
Layer your Cork Specialty paper on the lower half of your Basic White Cardstock 5 1/16′ x 3 15/16′ piece, adhere with Stampin’ Seal. Layer that to your Crumb Cake Cardstock piece. Wrap and attach on the backside your Gold Simply Elegant Trim, make two wraps. Stamp the poinsettia and leaves (need 3) in Early Espresso Ink on your 5 1/4′ x 4′ Basic White Cardstock. Diecut those with the Poinsettia Dies thru the Cut & Emboss Machine. Also cut a sprig from the Gold Metallic 6×6 Specialty Paper. Out of a scrap of Basic White Cardstock cut a tag shape to fit your choosen sentiment with the Tailormade Tag Dies.
With your Water Painters and the Petal Pink and Soft Sea Foam Ink you are going to watercolor the flower and leaves. Place a bit of Petal Pink coloring on the leaves to add highlights. Becareful not to apply too much water as it will cause the Early Espresso Ink to run into your image. Stamp your sentiment on the tag diecut in Early Espresso Ink. Attach your poinsettia with Dimensionals, place your leaves and sprig in an attractive way on the card front in behind the poinsettia flower. Layer the tag die cutout to the right of the poinsettia, tucking that in behind the flower. Tie a bow with the Linen Thread and Gold Simply Elegant Trim, layer on top of eachother with a Glue Dot over the tag hole. Decorate the card front with Sequins from the Expressions in Ink Ephemera Pack. Decorate your inside and envelope, Your Beautiful card is ready to send 🙂
Hope you love it! See you next week …
Paper Hugs,
Shanna
Leave a Reply